Minimum Bend Radius: The Specification That Kills Cables Early
Quick Answer: Bend radius is the most violated specification in motion cable, because the catalog value describes a gentle loop while real machines bend hardest at glands, entries and transitions nobody measures.
Ask a room of maintenance engineers what kills their moving cables and the honest answers cluster around one word: radius. Not jacket chemistry, not conductor count, but the tight little bend at a gland exit, a chain entry, a clamp that sits ten millimeters closer to the corner than the drawing showed. The datasheet says the cable bends at 7.5 times diameter. The chain provides that. The gland provides half of it, and the cable dies at the gland every time. This guide is about that gap between the rated radius and the installed radius. It covers what the number on the datasheet actually promises, where radius dies in real machines, why a violation at one point writes off the whole cable, and the specification and verification habits that keep the installed geometry inside the promise. It is the shortest deep dive in this series and possibly the one that saves the most cable, because radius discipline costs nothing at design time and everything after installation.
Introduction
The physics is unforgiving and simple. Bend a cable and its outer layers stretch while its inner layers compress; the tighter the bend, the higher the strain on the conductors, the shield and the jacket at the outside of the curve. Fine-stranded flexing cable is engineered to tolerate that strain cycle after cycle, but only up to the radius the construction was designed and tested for. Past that radius, the strain stops being distributed and starts concentrating: copper work-hardens at a point, the shield opens a gap, the jacket whitens and cracks. And because the whole cable passes through the same bend point every cycle, one tight spot ages the entire run. That is why radius violations are so expensive relative to their size: a pinch point the width of a thumbnail can retire a cable rated for millions of cycles. The general mechanics sit inside the broader catalog of cable failure causes, but radius earns its own guide because it is simultaneously the most common violation and the cheapest to prevent.
What the Datasheet Number Actually Promises
Read the radius specification carefully and it is narrower than it looks. The stated minimum bend radius usually refers to the cable flexing freely, at room temperature, around a smooth form, under its own weight and nothing else. It does not cover the cable pulled taut around a corner under tension, clamped immediately at the exit of a bend, or bent at the low end of its temperature range where every compound has stiffened. It certainly does not cover torsion, which multiplies the local stress at the same time the cable is bending. And the number is a minimum, not a recommendation: at exactly the rated radius the cable is spending its design life at full stress, with zero margin for the realities of installation. Good practice treats the rated radius as the floor for dynamic sections and gives moving cable generous extra room wherever the machine allows, because flex life rises steeply with radius and the extra centimeters are the cheapest service life you will ever buy. Remember also that the radius scales with diameter, so the dimension decisions in the cable size selection guide feed directly into the radius math. The reading discipline that applies to radius claims is the same one that governs any honest review of equipment datasheets, since radius is the single variable that moves flex-life numbers most.
| Location | How the Radius Gets Violated | The Fix That Costs Nothing at Design Time |
|---|---|---|
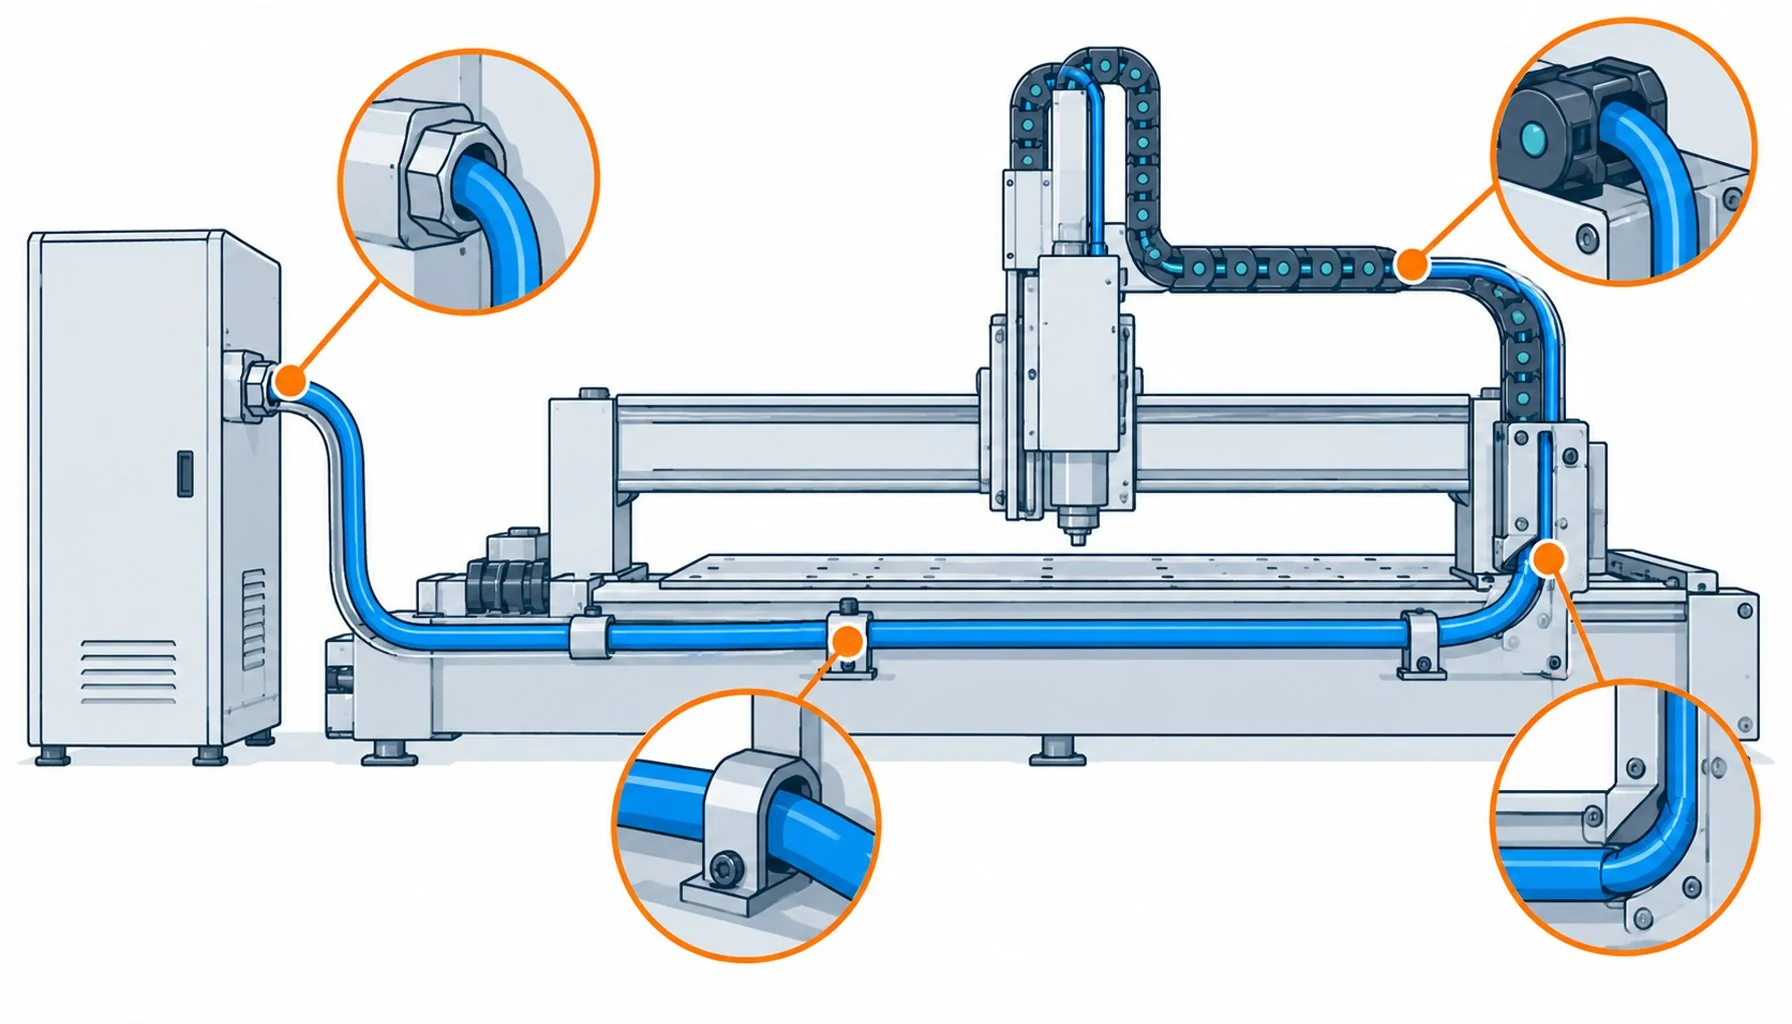
| Gland and connector entries | Cable enters the fitting straight from a bend; the fitting's internal shoulder pinches tighter than any chain | Service loop before every entry; right-angle or oversized glands where space allows |
| Chain entry and exit | Cable leaves the chain under lateral load and bends around the entry roller at a tighter radius than inside | Alignment of entry, lead-in radius larger than the chain's internal minimum |
| Clamps and standoffs | Clamp sits at the tangent of a bend, turning slack into a kink | Clamp after the bend completes, never at the tightest point |
| Transitions between guides | Two radii meet, and the effective radius at the junction is the worse of the two | Straight section between bends, or a radius compromise at the junction |
| Cold starts | Radius fine at 20 C, violation at minus 15 when the jacket has stiffened | Radius sized for the coldest start, or warm-up discipline for the machine |
| Robot wrist and small joints | Limited package space forces radii below standard ratings | Cable rated for the joint's actual radius, tested in geometry |
The Anatomy of a Radius Failure
Radius violations leave signatures that are worth learning because they close diagnostics in minutes. Conductor fatigue first: the copper work-hardens at the tight point and opens, presenting as an axis fault or intermittent continuity that tracks motion, usually at a regular cycle count. Shield rupture next: the braid opens a gap at the same spot and noise walks into the signals, which reads as EMI problems and passes bench tests with the cable at rest. Jacket damage third: whitening at the outside of the bend, then cracking, sometimes with the damage visible only when the cable is flexed to its working position. The diagnostic habit that catches all three early is the flexed inspection: put the cable in its worst working posture, not its rest posture, and look at the transitions. Failures at exactly one point on an otherwise healthy cable almost always name a radius or pinch problem at that point, and the repair that lasts is the one that moves the geometry, not just the cable. Swap in a better cable without fixing the pinch and you have bought the same failure a second time at a higher price.
| Step | What to Do | What It Prevents |
|---|---|---|
| Read the real number | Note rated radius in diameters and in millimeters for your cable size | Ordering cable whose radius promise shrinks at your gauge |
| Map the installed minimum | Measure the tightest point including glands, entries and clamps | Discovering violations after commissioning |
| Add design margin | Size dynamic sections well above the minimum where space allows | Living the cable at full stress with zero reserve |
| Fix transitions | Service loops, straight sections, clamps off tangent points | The gland and entry failures that top the statistics |
| Verify at cold | Check or size radius for the coldest credible start | Winter morning failures of a compliant-looking installation |
| Inspect flexed | Service checks at worst posture, eyes on transitions | Catching whitening and shield gaps before the line stops |
The Hardware Half of Radius Discipline
Radius is decided as much by hardware as by cable, and the accessories around the run deserve equal billing in the specification. Glands and strain reliefs control the cable’s geometry at its most vulnerable points, and an oversized or right-angle fitting frequently buys more life than an upgrade in the cable itself. Chain cavities and dividers set the internal radius the cable actually experiences; an overfilled chain bends its contents against each other, and the divider hardware that manages that is covered in the practical review of cable accessories. Clamps and standoff clips decide whether slack becomes a service loop or a kink. Even the routing path on the drawing, the one nobody revisits after layout, sets the transitions where two radii meet. Treat the hardware list as part of the cable specification and radius stops being a matter of installer care; treat it as an afterthought and every other document in the project is protecting a cable that a ten-dollar fitting will kill.
When Radius Rules Are Not the Answer
Honest limits: radius is not the only specification that matters, and chasing it can distort decisions. A cable given enormous radii everywhere but specified with the wrong jacket chemistry will still die in the coolant. Very tight packages, humanoid wrists and compact cobot joints, may genuinely not have the radius, and the answer there is a cable engineered and tested for that geometry, not a bigger loop. And static installations follow different rules entirely; the radius discipline here is for moving cable, where every cycle spends design life. The rules narrow the search and kill the most common failure; the duty map of the specific machine makes the final call.
RFQ Checklist: Putting Radius in the Purchase
Make the radius promise part of the order, not an assumption:
- Installed minimum radius per route, measured, stated in the request
- Flex data required at that radius, not at the supplier’s test default
- Combined duty named if torsion or tension shares the bend
- Coldest credible start temperature, with radius sized for it
- Gland and strain relief plan per termination, oversized or right-angle where space allows
- Installation clause: service loops before every entry, clamps off tangent points
Conclusion
Bend radius is the specification machines violate most and vendors quote most, which makes it the first thing to check when moving cable fails and the first thing to design when new machines are born. The number on the datasheet is a floor under laboratory conditions; the number that matters is the tightest bend in your machine, at your coldest start, under your worst posture. Measure it, design above it, and verify it at the transitions where it actually dies.
Kexingyu Cable Group (KXYE) quotes motion cable with radius-tested flex data and supports the gland, strain relief and routing decisions around it. Send your measured radii and duty profile through the RFQ page, and we will match constructions to the geometry you actually have, including the tight spots.