Robot Cable Troubleshooting: A Field Sequence That Finds the Fault and Protects the Claim
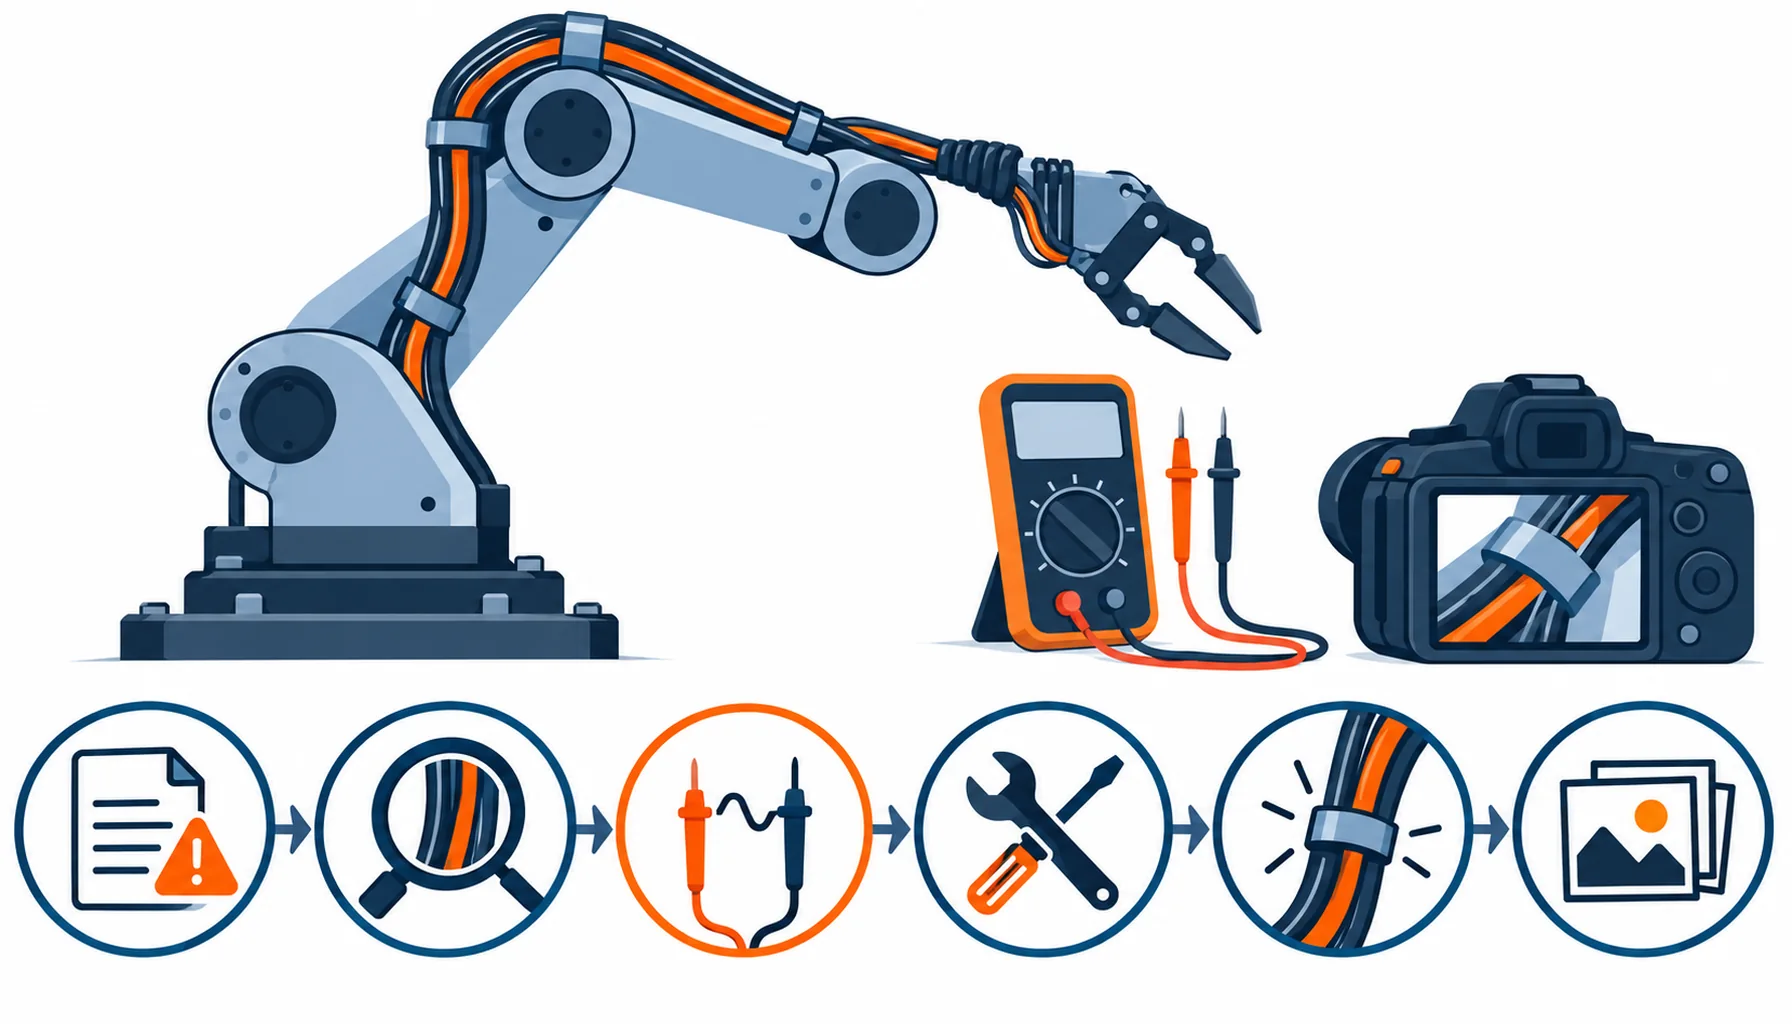
Quick Answer: When a robot axis faults intermittently, cable is the suspect that gets checked last and blamed first. This guide gives a troubleshooting sequence that isolates the harness in under an hour, records the evidence a warranty claim needs, and turns every incident into a better specification for the replacement order.
Introduction
Our earlier note on robot cable failure modes explains why these cables fail. This one covers the other half of the conversation, the hour after the line stops: how to work through a suspect harness methodically, in an order that eliminates causes instead of shuffling them, and how to document what you find so the supplier conversation that follows starts from facts. The difference matters commercially as much as technically, because a fault cleared without evidence is a fault you will pay for twice.
The sequence below is written for the person who owns both the downtime and the purchase order, which in most plants is the same maintenance lead. It assumes no special instruments beyond the meters most shops already carry, and it ends at the decision that actually saves money: repair, replace, or claim.
Start With the Symptom, Not the Harness
Intermittent axis faults, encoder errors that vanish after a power cycle, drive overcurrent trips at one specific posture: each pattern points at a different part of the harness. A fault that appears only at extreme wrist rotation suggests a torsion section. One that correlates with cable carrier travel points at the constant-flex run. One that moves with temperature, appearing after two hours of production, suggests insulation that has degraded rather than a conductor that has broken. Write the pattern down before touching anything, because the pattern is the first piece of claim evidence and the easiest to lose.
Correlation is cheap and powerful. Two production shifts of notes, times and postures, will usually separate a mechanical cause from an electrical one without opening the dress pack. The alternative, swapping drives and controllers first, resets the evidence and often resets the fault along with it, which is why the same machine returns every few weeks with the same symptom and nobody can say why.
Isolate the Harness in the Right Order
The physical sequence is short. Park the axis in the posture where the fault appears, because the fault lives in a position, not in a cable. Disconnect at both ends and test the run: continuity on every conductor, insulation resistance conductor to conductor and conductor to shield, at the meter ranges the cable datasheet implies. A run that passes at rest but fails when flexed by hand has a fatigue break, and the section that fails under your thumb is within a handspan of the fault. A run that passes every static test but correlates with motion in the logs points at the flex section or the terminations, and the termination check comes next.
Terminations deserve their suspicion before the cable does, because connectors and crimps fail more often than conductors. The connector-side failure patterns are catalogued in our note on why robot connectors fail, and the repair-side practice in our note on terminating robot harnesses. Re-seating a connector is a legitimate test; it is not a repair, and logging it as one is how intermittent faults survive until the warranty expires.
Keep the meter leads and the posture honest, too. A continuity reading taken with the cable routed differently from its working position can pass while the installed run fails, because the bend distribution changes with every re-dress. Whatever you unclip to reach a test point, note it, so the reading is read against the routing it was actually taken on.
One caution belongs in the sequence itself: never megger an encoder or communication pair with the drives connected, and follow the manufacturer’s limits for test voltage on instrumentation cores. The fastest way to convert a repairable harness into a scrapped one is a test voltage applied to the wrong pair.
The Decision Table: Field Diagnostic Steps and What Each One Buys You
| Step | What to record | Tooling | Value for the claim or reorder | Cost of skipping |
|---|---|---|---|---|
| Symptom log | Posture, shift time, temperature, which alarms | Shift notes, camera | Points at the failing section before disassembly | Hours of part-swapping that resets the evidence |
| Continuity check | Per-conductor result at both postures, rest and fault | Digital multimeter | Locates fatigue breaks to a handspan | Intermittent open circuits kept in service |
| Insulation resistance | Megohm readings, test voltage, temperature | Insulation tester | Separates degraded insulation from healthy runs | Ground faults found by the drive, not by you |
| Flex-under-hand test | Which section drops continuity while moved | Hands, meter, minutes | Confirms fatigue in the flex section without stripping | Wrong section replaced on the same harness |
| Termination inspection | Crimp photos, seat condition, relief geometry | Phone camera, loupe | Shifts or confirms the claim to the connector side | Cable blamed for a termination fault |
| Damage documentation | Wear photos at scale, cut samples retained | Ruler, camera, bags | Physical evidence the supplier can act on | A claim argued from memory |
Turn the Findings Into a Claim or a Better Order
Read the table as a sequence, not a menu. Each step either isolates the fault further or produces a record, and most do both. The whole pass costs one to two hours on a typical axis, which is less than a single speculative drive swap costs in downtime, and it ends with a file that supports whichever decision comes next.
Before the Next Failure: What to Prepare Now
If the harness is inside its warranty period, the file you have just built is the claim. Suppliers process evidence-based claims quickly and memory-based ones slowly, and the difference is mostly the photographs: wear at scale, crimps before disturbance, meter readings with the test voltage noted. Our note on the robot cable warranty sets out what a claimable failure looks like from the supplier’s side, and the interrogation of wear marks in our note on cable wear patterns tells you whether the damage you are looking at is even cable’s fault.
If the harness is out of warranty, the same file becomes the specification for the replacement. A harness that failed at the flex section gets a replacement qualified for the actual cycle count, not the catalogue default. One that failed at the wrist gets the torsion section reviewed against our note on torsion cable construction. One that failed at every termination gets the termination practice fixed before the cable is blamed again. The reorder that quotes the failure evidence back into the specification is the cheapest reliability upgrade most plants ever buy, and the vehicle for it is the standing robot cable RFQ.
For fleets, close the loop in writing: one page per incident, filed against the asset number, reviewed quarterly. Three incidents at the same axis is not bad luck, it is a duty profile the harness was never specified for, and the quarterly review is what catches it before the fourth.
One habit separates the plants that diagnostic sequences serve well from the ones that merely tolerate them: the file survives the people. Shift rotations and staff turnover erase verbal history fast, and a harness replaced three times under three different technicians reads as three unrelated faults until the written records say otherwise. The template costs nothing, and the first incident it cleanly documents usually repays the typing.
When Troubleshooting Deeper Is Not the Answer
| Item | What to state | Evidence to attach | Cost of leaving it open |
|---|---|---|---|
| Test limits | Meter ranges and voltages per circuit type | A one-page sheet per cable type | Overvoltage tests that destroy good cores |
| Access procedure | How the dress pack opens on each robot model | Photos in the maintenance manual | An hour lost at every incident |
| Recording template | The six steps, with photo slots | A printed or digital form | Claims rebuilt from memory |
| Baseline readings | Commissioning megohm values per axis | Filed commissioning records | No reference for what degraded means |
| Escalation threshold | When a fault becomes a line-down spare swap | A written rule | Improvised decisions at the worst hour |
| Spare strategy | Which harnesses to hold, pre-terminated | A stocked-items list | Weeks of lead time at each failure |
| Claim window | Warranty periods per supplier on file | A contract register | Evidence collected after the claim died |
| Repair policy | Which faults are field-repairable, which are not | A policy note with examples | Repairs that fail worse than the fault |
| Supplier contact path | Who receives evidence, with what response time | A named contact per supplier | Claims queuing behind generic inboxes |
| Review cadence | Quarterly incident review, fleet-wide | A calendar owner | Repeat failures read as bad luck |
RFQ Checklist
When the fault is above the cable’s pay grade. A drive that trips on every axis, a controller error that follows the program rather than the posture: these are not harness faults, and two hours of megger readings will not change that. The sequence exists to eliminate the cable quickly, not to make cable the default answer.
When the harness has failed three times. Past the second or third repair on the same section, further diagnosis is procrastination. The duty profile and the construction are mismatched, the evidence file already proves it, and the economical move is a replacement specified from that file, along the lines of our note on robot cabling serviceability.
When nobody recorded the baseline. Without commissioning readings, insulation trends cannot be interpreted, only guessed. That is an argument for baselines on the next install, not for inventing thresholds now; a guessed threshold condemns healthy harnesses and pardons sick ones with equal confidence.
When the evidence is needed more than the uptime. A harness that fails at warranty month eleven should, in some plants, be run one more documented shift to capture the fault on record before scrapping. Whether that trade is worth an hour of risk is a commercial decision, and it should be made by someone who knows the claim value, not by the shift with the torque wrench.
Conclusion
- Test voltage limits per circuit type stated by the supplier and posted at the line
- Commissioning insulation and continuity readings required as a delivery deliverable
- Warranty period, claim evidence requirements and response time written into the contract
- Cycle rating for each flex section matched to the logged duty profile, not the catalogue default
- Torsion section rating stated separately from the flex rating
- Termination hardware and crimp specifications supplied with the harness drawings
- A named evidence contact at the supplier, with an agreed response window
- Pre-terminated spare harnesses for the axes with the highest downtime cost
- An incident recording template in use before the first failure
- A quarterly review that converts incident files into specification changes